Custom Live Preview for Gatsby Sites with Heroku
Gatsby, a React and GraphQL based static site generator, is just awesome. The performance you get out of the box is outstanding and the developer experience worldclass. But there are also a couple disadvantages and pain points. One of the most prominent ones is the lack of immediate visual feedback for an editor using a CMS like Contentful, DatoCMS, Prismic or any of the other Headless CMS's.
The Gatsby team/company is well aware of this and currently working on a solution called Gatsby Preview to let you see content changes before going live. But it's currently invite only and at first only for Contentful CMS. In the meantime you could build your own.
I have no idea how exactly Gatsby Preview will work and what it all includes, but for local development this already works when running gatsby develop. To enable previewing content changes for editors we therefor need to run gatsby develop also in a production environment.
Typically Gatsby sites are deployed to Netlify or a similar host for static sites. But as Webpack Dev Server is started when you run Gatsby with the develop argument our preview server needs to be able to run Node applications. You could use something like a Digital Ocean droplet, but I find it easier to use a platform like Heroku.
So lets start with setting up a Gatsby Dev Server on Heroku for live preview.
Setup Gatsby Site
To follow along execute the steps below or clone the this repository. If you clone the repo you still need to setup DatoCMS.
-
Create a new Gatsby site with
gatsby new custom-live-preview. -
Setup DatoCMS backend: Go to the DatoCMS homepage and sign up for a free account. When logged in click New project, choose Blank project and give it a name. Next we have to define a model for our page. In DatoCMS you define the schema of your database with models. You can read more about it in the Documentation.
-
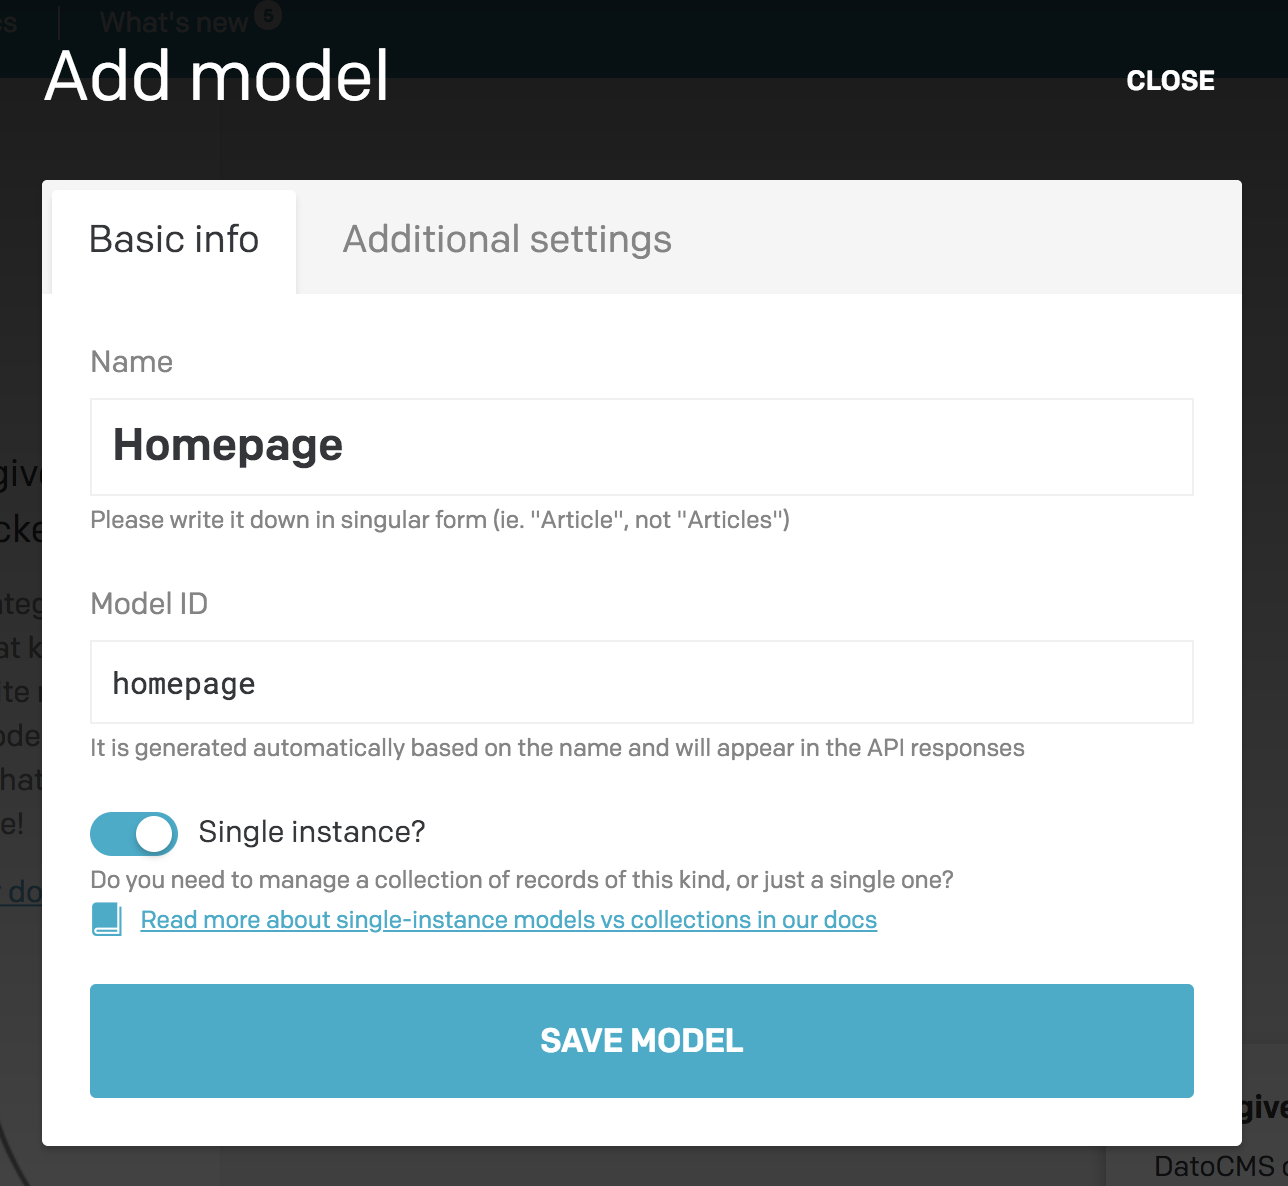
Create model Homepage: We keep it simple and only create one model for our homepage with one text field. Click + to add a model, call it Homepage and select Single Instance?. Then to add fields click Add new field, choose Text and then Single Line String and call it Title.
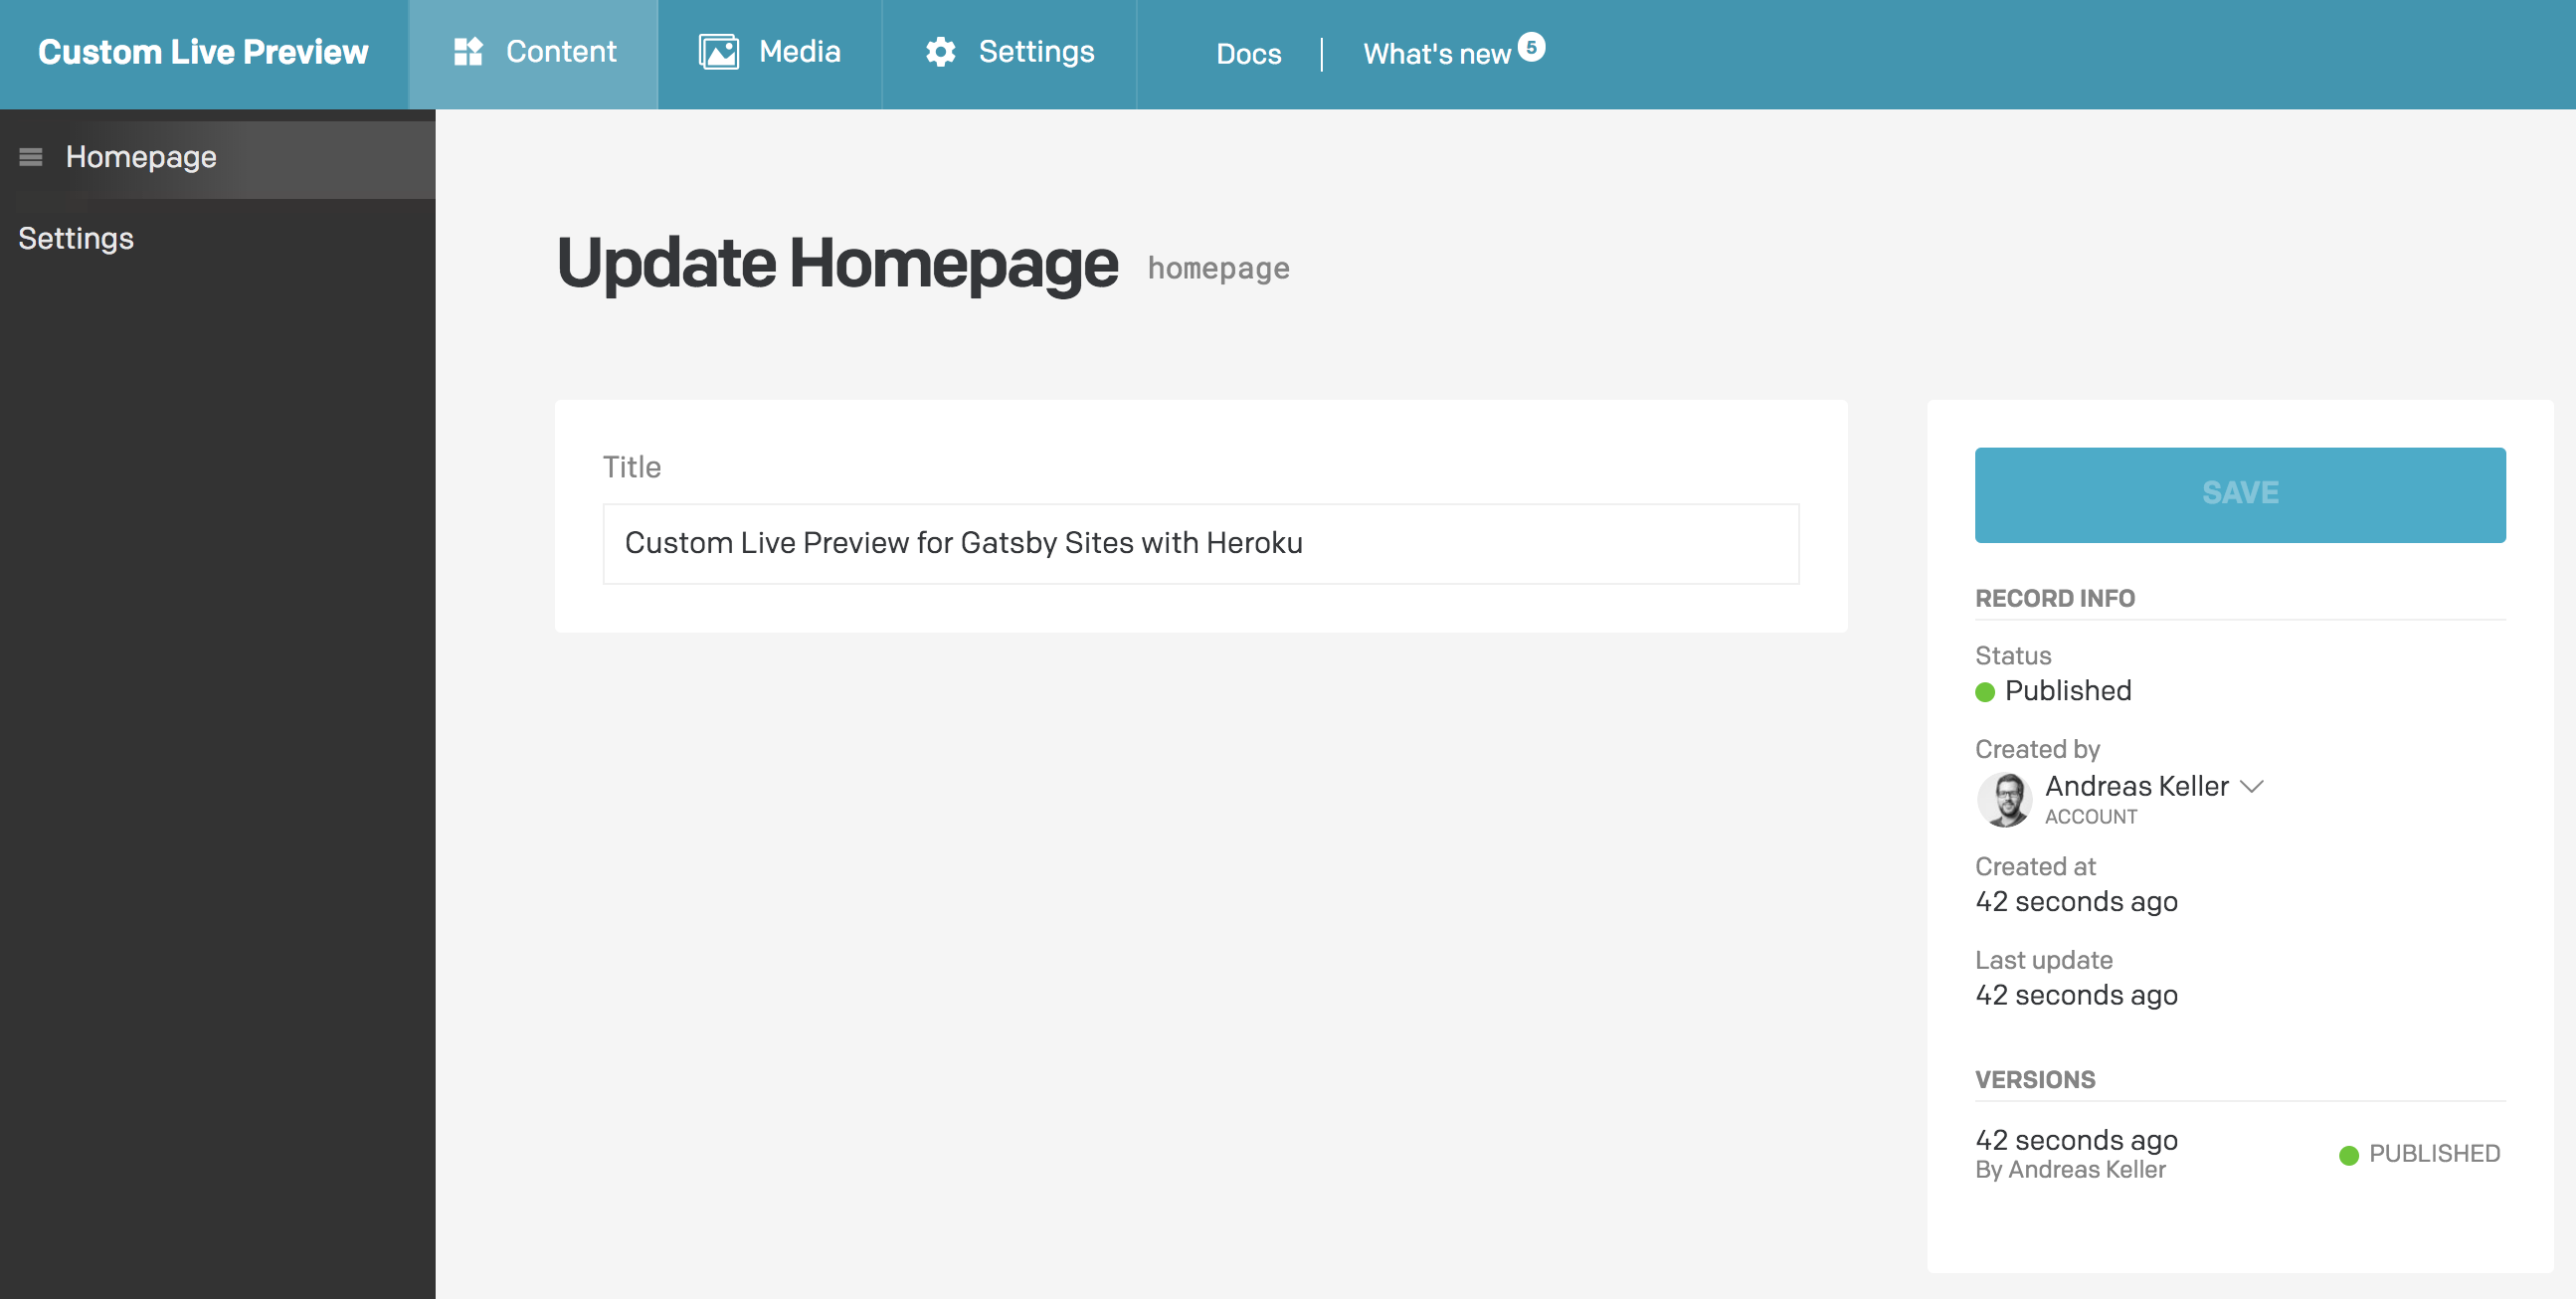
- Add content: With the created model we now need to enter a title. Go to Content in the dashboard nav bar and choose Homepage in the sidebar. Enter a title like e.g. Custom Live Preview for Gatsby Sites with Heroku and click Save.
-
Add the DatoCMS source plugin as a dependency to our site with
yarn add gatsby-source-datocms@2.0.1The exact version number is important, because at the time of writing this blog post the version npm is referencing is 1.1.15 which is only compatible with Gatsby V1 and not Gatsby V2. -
Copy the following configuration into your
gatsby-config.jsfile and fill in your readonly api token.
// In your gatsby-config.js
plugins: [
  {
    resolve: `gatsby-source-datocms`,
    options: {
      // You can find your read-only API token under the Settings > API tokens
      // section of your administrative area:
      apiToken: `YOUR_READONLY_API_TOKEN`,
    },
  },
];
- Start your site locally by running
yarn developto check if there are no errors. Then open GraphiQL, probably under http://localhost:8001/___graphql. You should be able to query the Homepage content with this query. Learn more how to query your DatoCMS data here.
{
  datoCmsHomepage {
    title
  }
}
- Now we need to access this data inside our app. We want to replace the default title
Gatsby Default Starterwith the one from DatoCMS. The title in the Header component is passed from the Layout component. In the Layout component (components/layout.js) we replace the query
query SiteTitleQuery {
  site {
    siteMetadata {
      title
    }
  }
}
with
query SiteTitleQuery {
  datoCmsHomepage {
    title
  }
}
and further down we pass it to the Header like so <Header siteTitle={data.datoCmsHomepage.title} />.
The complete source code of the new Layout component looks now like this.
import React from "react";
import PropTypes from "prop-types";
import { StaticQuery, graphql } from "gatsby";

import Header from "./header";
import "./layout.css";

const Layout = ({ children }) => (
  <StaticQuery
    query={graphql`
      query SiteTitleQuery {
        datoCmsHomepage {
          title
        }
      }
    `}
    render={(data) => (
      <>
        <Header siteTitle={data.datoCmsHomepage.title} />
        <div
          style={{
            margin: `0 auto`,
            maxWidth: 960,
            padding: `0px 1.0875rem 1.45rem`,
            paddingTop: 0,
          }}
        >
          {children}
          <footer>
            © {new Date().getFullYear()}, Built with
            {` `}
            <a href="https://www.gatsbyjs.org">Gatsby</a>
          </footer>
        </div>
      </>
    )}
  />
);

Layout.propTypes = {
  children: PropTypes.node.isRequired,
};

export default Layout;
- With our local dev server running lets check updating our title. Go to the DatoCMD dashboard to our Homepage content and update the title to something else. It should immediatly change locally without a page refresh.
Deploy dev server to Heroku
To let content editors benefit from the same immediate feedback we need to deploy our dev server to a production environment.
The easiest way I found is using Heroku. I also tried with Now V1 but got an error /bin/sh: lscpu: not found.
-
Sign up for a Heroku account or log in if you already have one.
-
To deploy Node.js apps on Heroku you need Git installed and the Heroku CLI. Follow the instructions here.
-
Initialize git with
git init. -
Run
heroku createwhich creates an app in Heroku and automatically adds a remoteherokuto your git repository. -
Per default Gatsby comes with both a
yarn.lockand apackage-lock.jsonso you can choose which package manager you want to use. For Heroku that's a problem. You need to delete one or the other. As we usedyarnto add ourgatsby-source-datocmsplugin lets removepackage-lock.json. -
Before we can deploy our app to Heroku we need to add a
Procfile. Heroku uses this file to determine how to start the app. If noProcfileis available Heroku runsnpm startbut that fails because we need to run our Gatsby dev server on a specific port which Heroku provides through environment variables.
With a Procfile we can achieve that. Create it in the root directory with the following content:
web: gatsby develop -p $PORT -H 0.0.0.0
Like that we instruct the underlying Webpack Dev Server to run on the port Heroku expects. The -H 0.0.0.0 is also necessary so that the Webpack Dev Server accepts remote connections.
- There is one last problem. When trying to open your Heroku app Gatsby displays a message
Error: It appears like Gatsby is misconfigured...thats because per default Heroku sets the environment variableNODE_ENVto "production" which causes this error. You can easily fix it by runningheroku config:set NODE_ENV=developmentor by setting a env variableNODE_ENVto "development" in the dashboard.
After this change your Heroku app should successfully run the Gatsby Dev Server and we can now check if content changes are immediatly displayed. Change the title again in your DatoCMS dashboard and the changes should be visible almost instantly.
Enable Draft/Published system for DatoCMS model
If you set up your DatoCMS project to automatically trigger a build when you update content e.g. with Netlify then you need to perform an additional step to wait to trigger a build until you checked the updated content in the preview and are satisfied with it.
Enable draft/published system for the Homepage model in the settings.
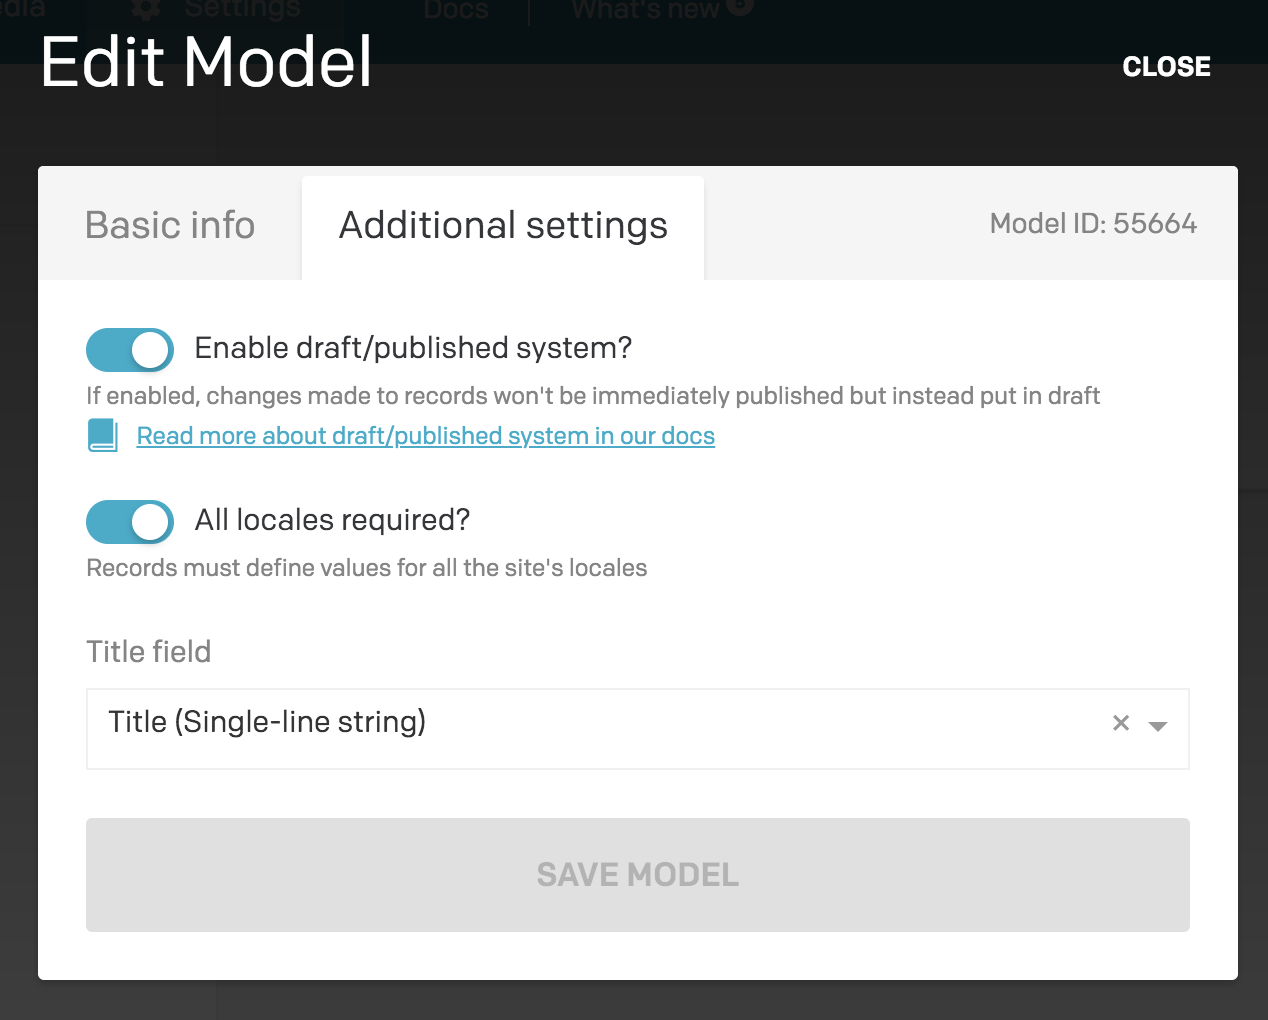
You can read more about it here.
To enable our preview to display changes in draft state you need to add previewMode: true to our gatsby-config.js file.
// In your gatsby-config.js
plugins: [
  {
    resolve: `gatsby-source-datocms`,
    options: {
      // You can find your read-only API token under the Settings > API tokens
      // section of your administrative area:
      apiToken: `YOUR_READONLY_API_TOKEN`,

      // If you are working on development/staging environment, you might want to
      // preview the latest version of records instead of the published one:
      previewMode: true,
    },
  },
];
Conclusion
With this setup we have a modern, ultra performant website which gets built automatically when pushing changes to git (with Netlify) and if we push to Heroku we also get live preview for our content editors. I think thats pretty sweet and a real alternative to Wordpress, Drupal etc.. You could even use Wordpress and Drupal as a Headless CMS with this setup and still benefit from the awesome developer experience of Gatsby. Have you used something similar for production Gatsby sites? What experiences did you make?